This helped me:
- repair (internal, disk0 – in your case)
diskutil repairdisk disk0 - resize (synthesized, disk1 – in your case with HS)
diskutil apfs resizeContainer disk1 0
After repairdisk resizeContainer works with no errors.
I had a similar problem caused by dd: all console tools (e.g. diskutil list) showed correct size of the partition (100 GB in my case), but the Disk Utility and OS X low free space notification thought it was smaller (25 GB in my case).
What I did was to resize the partition to 25 GB using diskutil resizeVolume disk0s2 25G and then resize it back to the max using diskutil resizeVolume disk0s2 limits (substitute your chosen partition for the disk0s2).
It didn’t work at first when I tried it on a live partition. But when I retried it from an external disk and added some diskutil verifyDisks and diskutil verifyVolumes between the resize commands, it magically worked.
Most everyone, including yours truly, has at some point needed to resize partitions or make new ones. Unfortunately, dare I say it, unlike Windows, OS X does not have any built in tools to edit the partitions. I will admit that that isn’t necessarily true because you can erase and reformat current partitions but, like I said earlier, if you need to resize your partitions then you’re just S.O.L. (Sh*t Out Of Luck). Well, that is if you are 100% dependent on the OS to do exactly what you need. But we must sometimes, actually a lot of the time, turn to 3rd party software to help us out. So for this guide we are going to turn to the wildly popular GParted Live.
GParted Live currently supports 14 different formats including NTFS, FAT32, EXT2, and of course HFS and HFS+. It is this support that makes GParted such a valuable tool. GParted has the capability to shrink, extend, delete, format, clone, and do much more with HFS partitions, a feat that cant be achieved inside of OS X. So if you need to make more space for OS X, shrink it down because it has too much space, or make a new partition in the “reiser4″ format just to look cool, follow along.
1.) First off, you’re going to need to download GParted Live. It is 100% free and plus its open source.
2.) Next, you have to burn the iso to a CD/DVD, restore it to a flash drive through Disk Utility for booting off of, or pretty much anything else that you can boot off of.
3.) Once you have your copy of GParted ready and bootable, you need to open Disk Utility.
4.) Click on your OS X partition on the left that you want to edit.
5.) Hold down the Windows Key (Option key for readers who are on a real Mac) and click File in the Menu Bar. Then click on the Disable Journaling option
6.) Close Disk Utility and restart your computer with the Disk/USB Drive in the computer
7.) When the black screen appears with the big, blue Dell words, start tapping F12 until the screen disappears
8.) On the new screen that appears select to boot from the appropriate device that you put GParted on
9.) Go through the options that appear although if you prefer the program to run in English and you don’t care which resolution it runs in then you can just hit Enter for the default option for each question
10.) GParted will finish booting and the Partition Editor will automatically launch
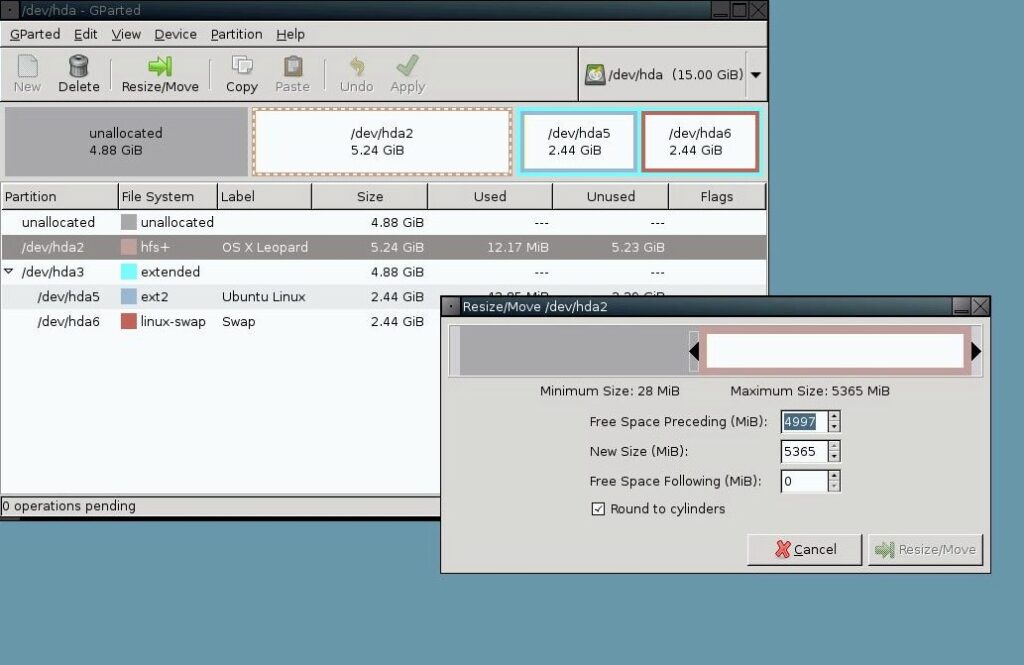
11.) From here you can just play around with the options until you get the feel of everything because the changes aren’t actually applied until you hit the Apply button (the green check mark that says Apply underneath it). Just a quick note that most everything you need to do for resizing and extending will be found under the Resize/Move button.

12.) Once you feel confident that you have your partitions set up properly, go ahead and hit the Apply button and your changes will start to be saved to the Hard Drive. When you are moving partitions around and shrinking them and what not, all the data must be moved from the original partition to the new partition so this can take onwards of an hour depending on how much data you have. Just be patient because in the end, it is well worth it.
13.) After you have applied your changes and “All Operations Successfully Completed,” restart your computer by double clicking on the Exit icon on the Desktop and then selecting Restart
14.) The system will begin restart, tell you to remove the disc, and then to hit Enter
15.) Boot back into OS X and launch Disk Utility. Then re-enable Journaling by clicking on the partition on the left and clicking the green Hard Drive button at the top of the window.
16.) Pat yourself on the back for successfully resizing your partitions using GParted Live. Just remember, this tool works with most formats including NTFS which is used by Windows.
Link: http://dailyblogged.com/1076/resizing-hfs-partitions/#ixzz2TJdd9vRc